
 Josh Gartner
You got a 1HZ. Congrats.
Someone asked me once, “why do I just love this old Troopy so much? It’s so bloody slow but I just can’t give it up’
I told them, ‘It’s like driving a sports car, but in super slow motion.’ It’s the same amount of work as one.
Constantly changing gears.
Constantly correcting the steering.
But realistically, you probably didn’t think about how slow this thing would actually be… once you added all that weight, lift kit, tyres…. god forbid a caravan.
And now you’re here, reading my article called ‘thinking about turboing your 1HZ?’
That must mean, you’re thinking about turboing your 1HZ.
Let’s talk about it.
I’m gonna be a bit blunt, but please don’t mistake my confidence as cockiness.
I’ve just done a lot of these things, so I like to cut out the bullshit.
Adding a HD Auto turbo kit is easily the most effective dollar per horsepower method to get it moving. You may however be asking yourself, is this something I can do at home? That’s what this article is here for.
One last thing, before we get into it, if you follow this article correctly, every, single, little, thing, will, just, work, first, time, and, bolt, right, up. Simple.
The Turbo Itself
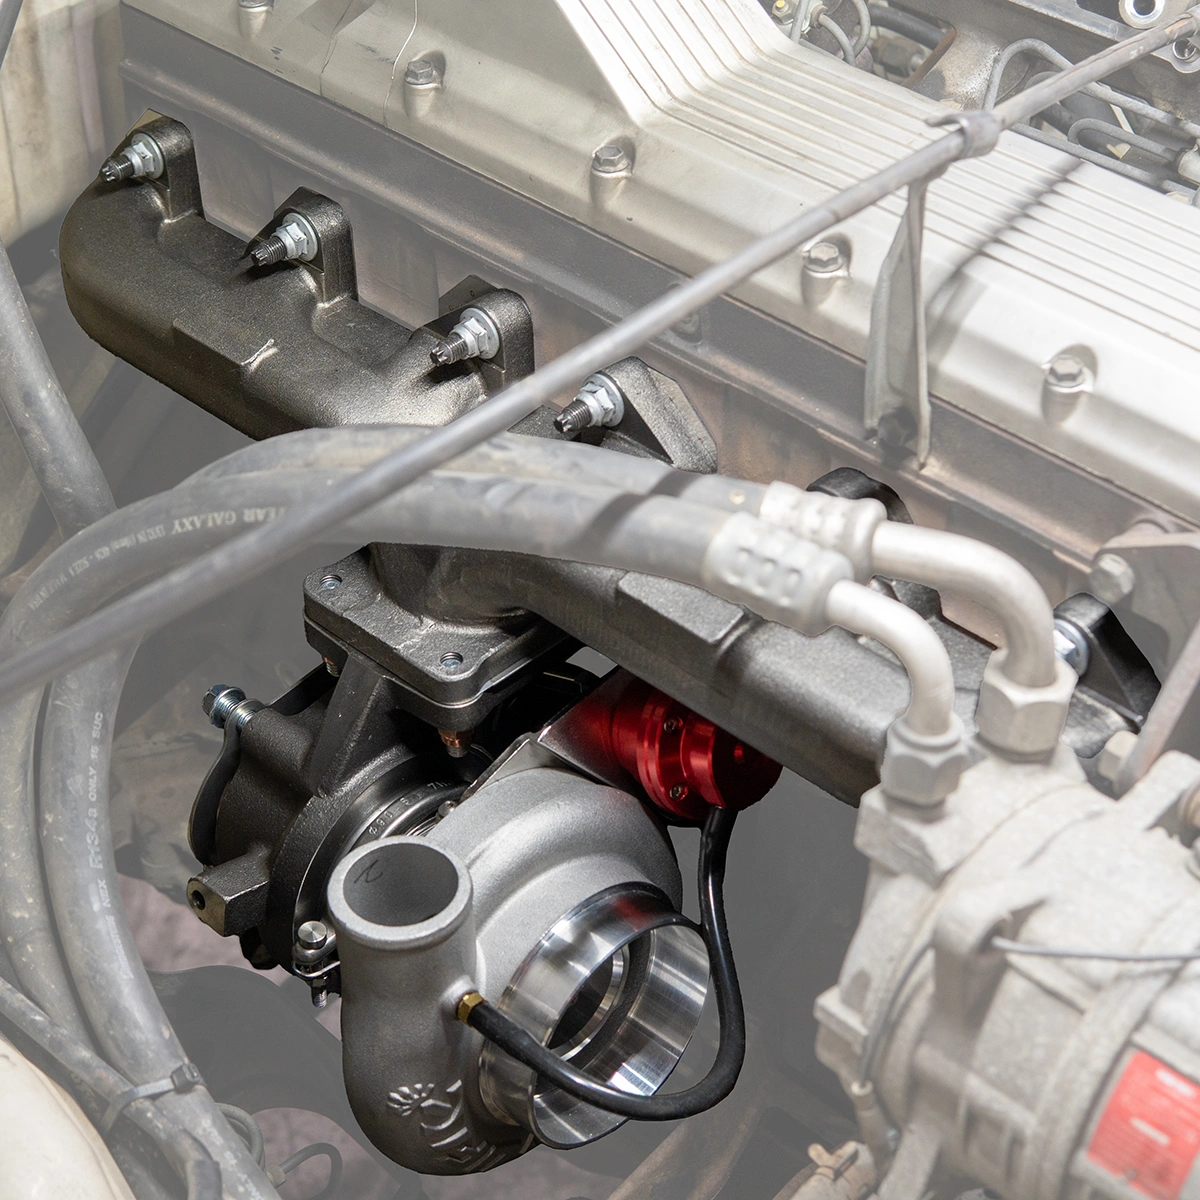
You’ll be running an Arashi or UFI turbo, which bolts straight up to the supplied Tillix Split Pulse Merge exhaust manifold. Wastegate pressure is set around 15 psi, but each of these turbos can safely push more with supporting mods. Take a look how good this all looks bolted up below.
Arashi is there for if you ‘just wanna turbo it, not looking for anything to crazy or make it a race car’. Keep in mind though, hundreds and hundreds of these kits sold and can 100% publicly say because it’s true, not one turbo failure for the fault of the turbo on it’s own. Super unit when considering value for money here.
The UFI is there if you just want the best. The best quality. Bullet proof reliability. No limit to horsepower potential depending on size, all that stuff from a performance based turbo. This is still our most popular kit of the two.
Oil Feed & Drain
This is where some first time installers get nervous. I also get worried the USA might invade my driveway if I spill any.
Oil feed: Oil supply comes from the oil pressure switch in on the passenger side of the block. The braided oil feed line (AN4) comes preassembled, ready to go. Tee it in with the supplied fittings as shown below. That easy.

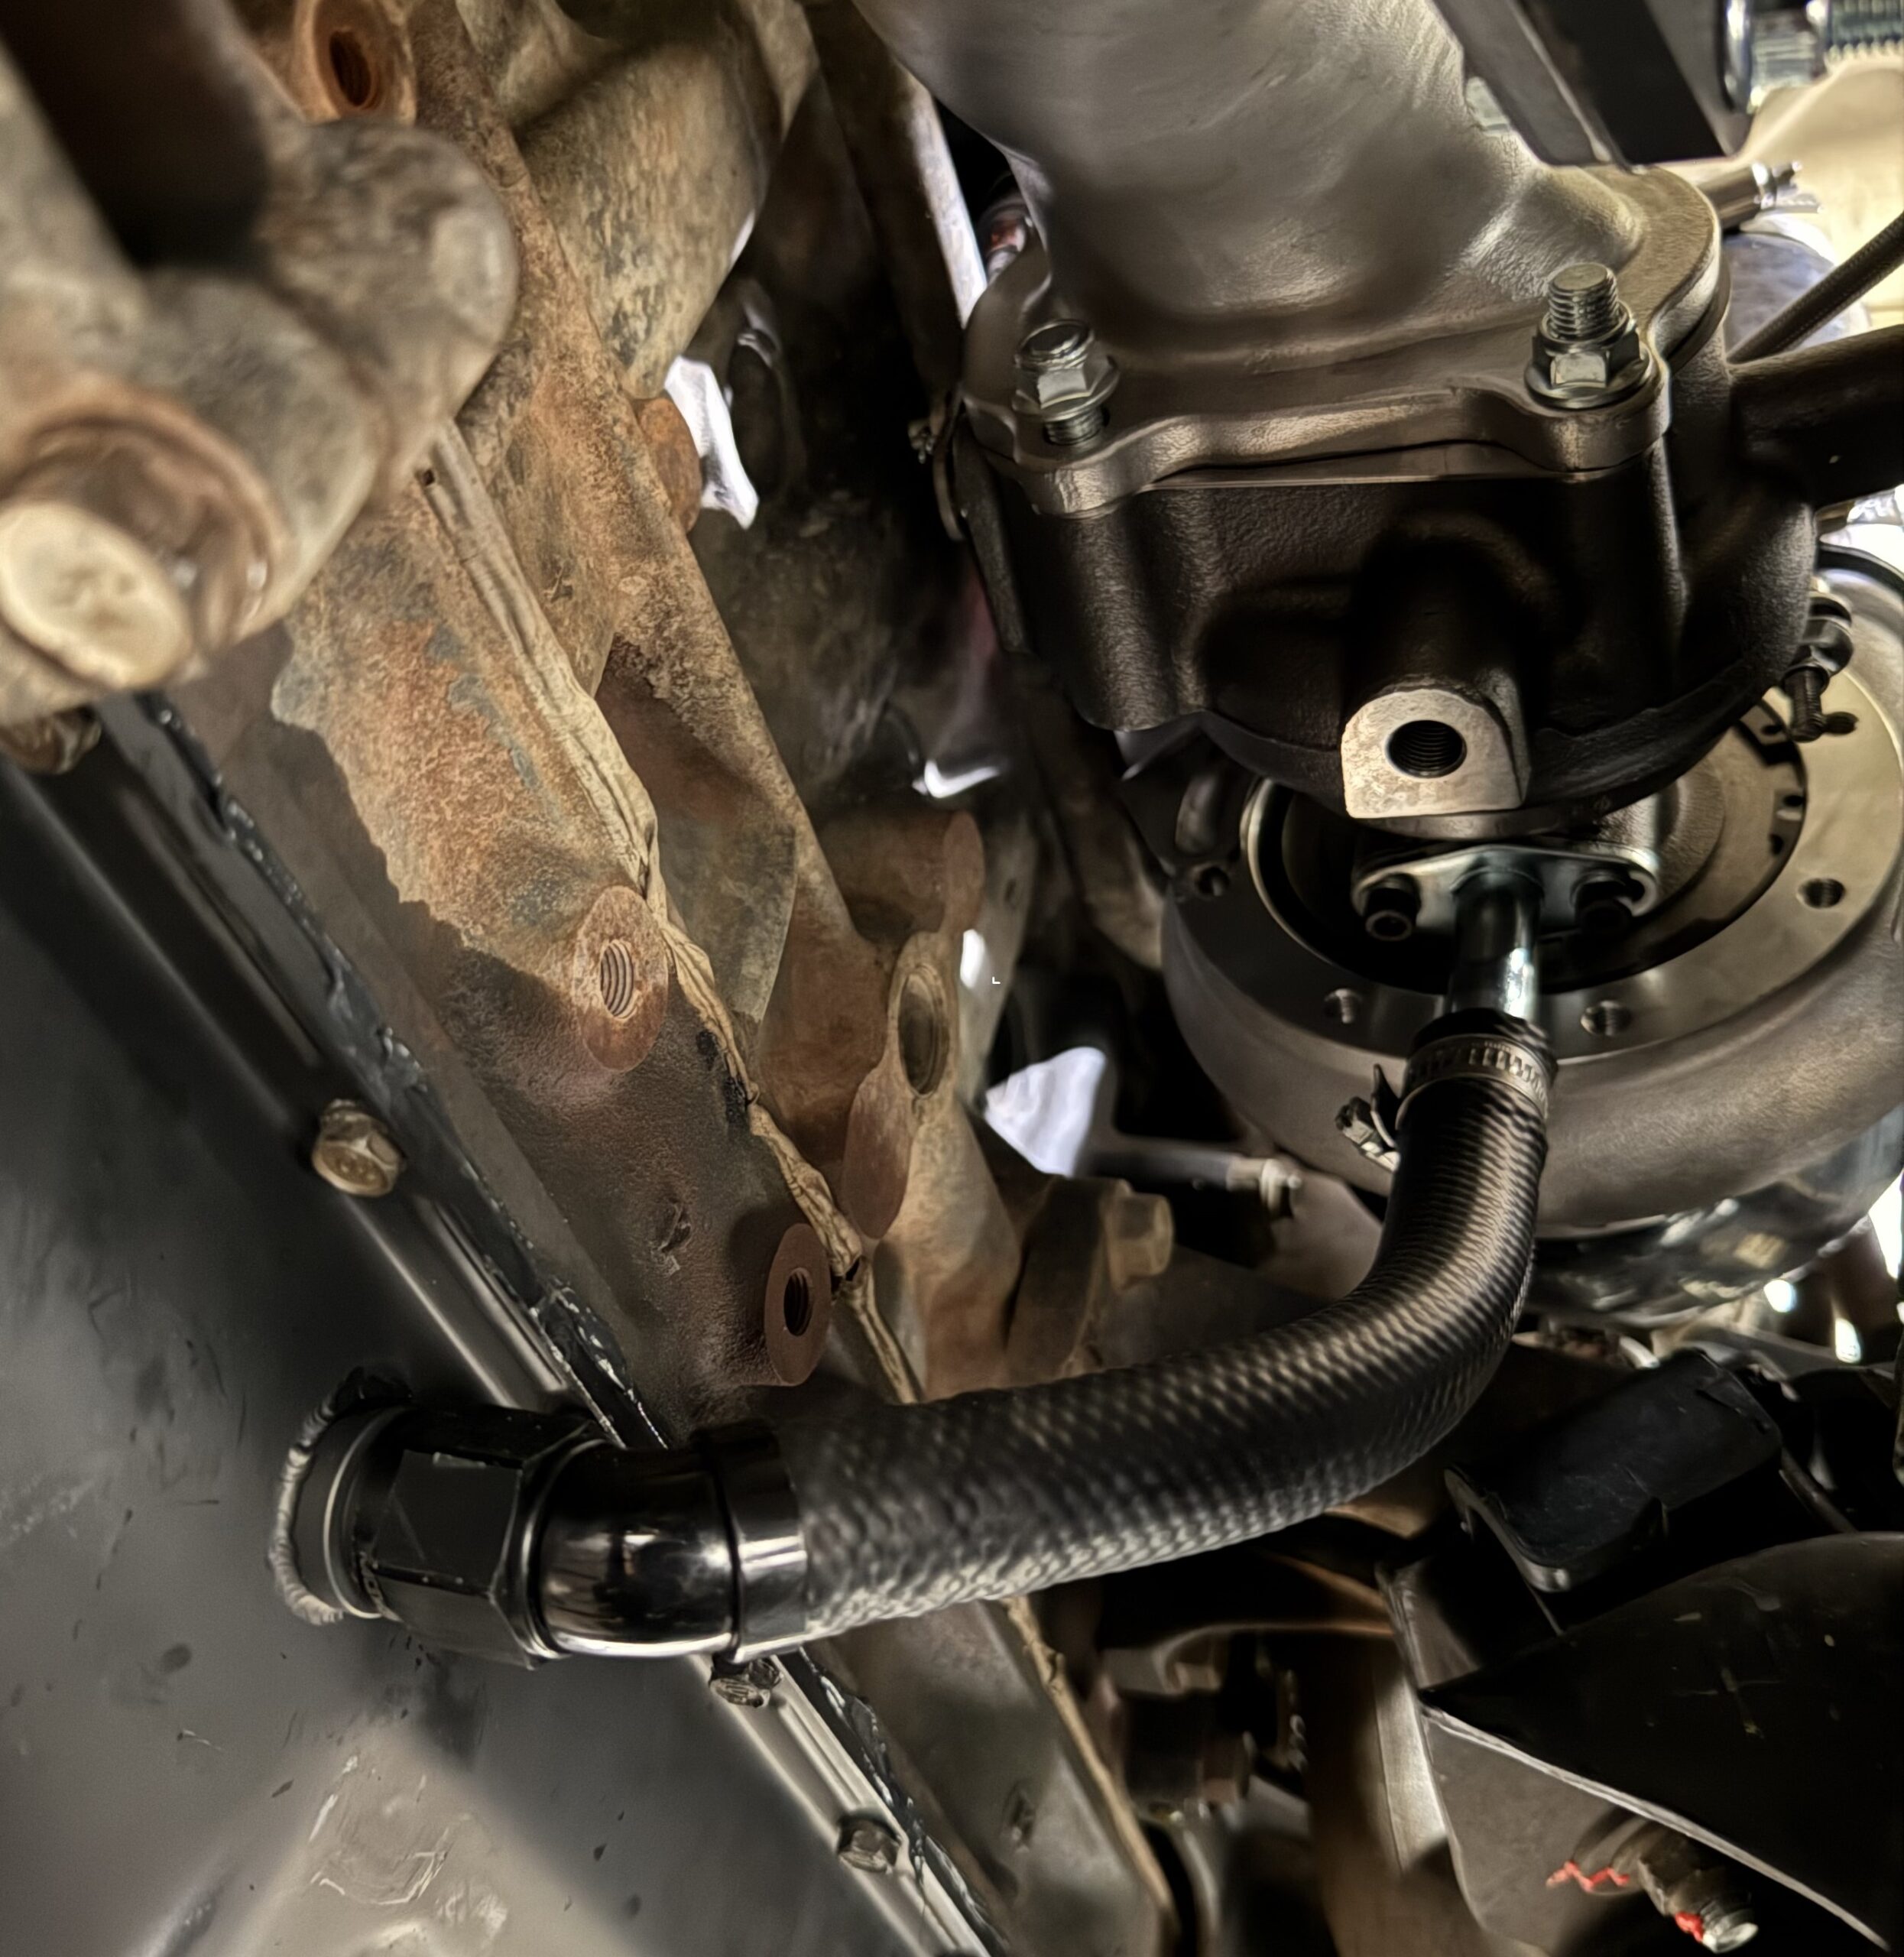
Oil drain: This is the larger hose (AN8) running from the turbo back into the sump.
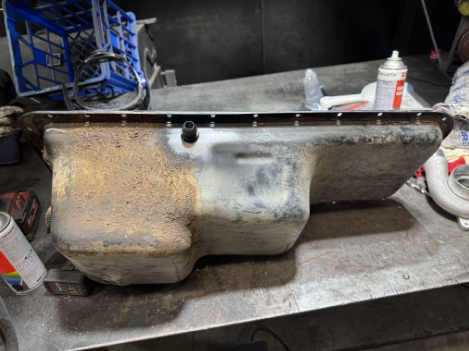
You’ll need to weld the supplied fitting as high as possible on the sump so it’s not sitting in oil.
This will be the least DIY friendly part of the whole install for those of us who don’t have access to a welder.
That being said most fabrication shops or local mechanics will be able to do this for you for a very reasonable price so don’t let it deter you. They generally like beer.
The sump is double skinned so it will have to be removed and have both the inner and outer layer welded.
Below are examples of how the finished product should look
Exhaust Manifold & System
Fitment wise the best way we’ve found here in our workshop is to build the turbo and manifold together on the bench, then bolt it on as one unit.
For the UFI kits specifically you may have to use a wooden hammer to move the hard-line heater pipe on the drivers side of the block just slightly out of the way.
These can be pressed from the factory at all sorts of different angles depending on your specific engine, some will need to be moved more, some won’t need to be moved at all.
As for an exhaust, a 3-inch system is a must. Mufflers won’t kill horsepower, just the noise. Spec to your preference.
If you’ve gone for the dump pipe option, fabricating from there back is straightforward.
Alternatively, you can grab a full bolt-in system from our website if you want it all ready made. Again, the most popular route as it all just bolts up.
Breather & Intake Setup
You cannot run the crank case vent back into the factory cross over pipe. The intake crossover pipe will now have boost pressure in it, which would be sending it into the wrong place. Engine’s like boost in their cylinders, not in there crank case.
Also before we get ahead of ourselves here,
DO NOT FIT A CATCH CAN, PLEEASSSEEE. Delete it if you have already got one.
The Solution
Replace the factory breather port with the supplied fitting in the crossover pipe.
Removing the factory port can be done easily enough with a vice or vice grips.
Replacing it with the fitting is just as straight forward. Send the push in fitting home ‘gently’ with a rubber mallet and you’re done.
As an added bonus the new fitting has a 1/8” BSPT thread ready for a boost gauge so you can keep an eye on what your newly fitted turbo is doing as you cruise down the road.
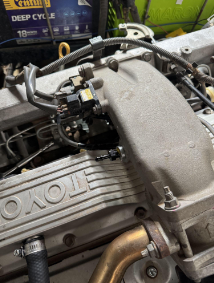
Then reroute the valve cover breather hose so it connects before the turbo. When purchasing your kit if you select the “Add Turbo to Airbox Pipe” option the kit will come supplied with an induction pipe ready to go with the provision for the PCV hose.
We find this to be a far superior option to the typical “shove it in the chassis rail” method as the intake helps to suck pressure out of the crankcase and prevent rocker cover gasket and sometimes even rear/front main seal issues. Plus it keeps everything legal so win win.
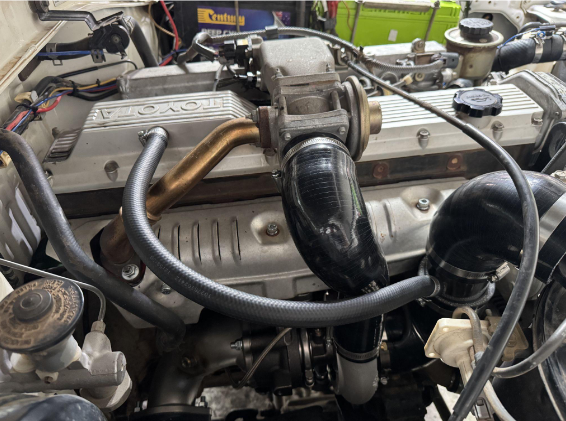
Keep it simple.
Sweet, you now got a 1HZ with a HD Auto turbo kit. With a tune and a clutch that’s up to the task you have now more than doubled the factory horsepower on your Toyota Landcruiser. Enjoy driving up hills without having to change down a gear for the first time.
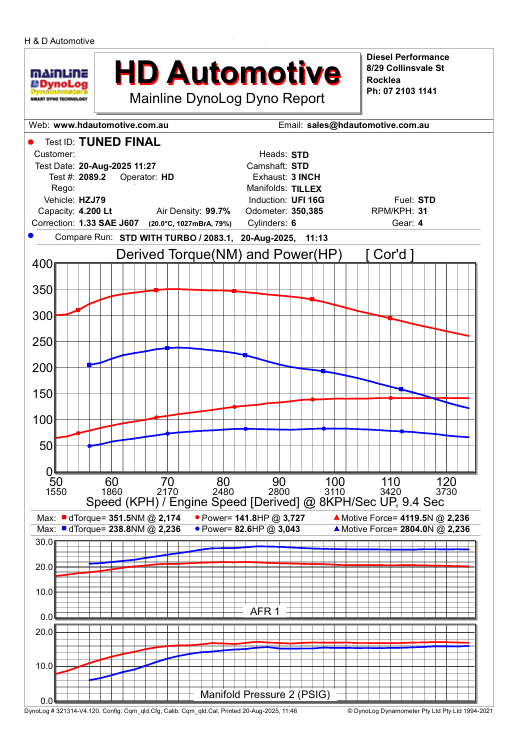
The results really speak for themselves. The above dyno sheet is from a HZJ79 with just over 350,000 kms on the clock but we’ve seen similar results from vehicles with nearly double that mileage. Stock flat top injector pump, non-intercooled, nice and simple.
All in all this is most certainly a job that most at home enthusiast can complete.
If you can change wheel bearings or fix an oil leak you can fit a 1HZ turbo kit. The kit is supplied with everything you’ll need so no extra weekend runs to the parts shop or hardware store. And is able to be completed with a relatively basic set of tools.
So why not have a crack?
You can see our 1HZ Arashi turbo kits here, and our UFI 1HZ Turbo kits here.
If you want to add an intercooler to the whole package, that’s no problem either. We’ve done a write up on each model in the products description, which is available from these links below.
Toyota Landcruiser 80 Series PDI Front Mount Intercooler Kit
Toyota Landcruiser 70 Series PDI Front Mount Intercooler Kit
Toyota Landcruiser 105 Series PDI Front Mount Intercooler Kit
6 comments
Great article mate. I’ve got an 80 with 703,000km. I might have to look at a rebuild before I bolt a turbo on
Hey Matt, thank you for the amazing feedback, mate. Glad you found the article valuable. That’s a hell of a lot of kilometres on that 80 series. I definitely recommend looking at a rebuild before you turbo this one.
Best change the pistons and rods for 1HDT ones while you have it apart. They have bigger gudgeon pins and are gutsier pistons
Hi Bruce,
You cannot use 1HD-T pistons in a 1H engine, as they have different fuel injection systems.
Hey I have a 1995 1HZ 267k with extractors 21/2 inch , will it work with them
Price as well
Thanks
Hi Mark,
Cheers for the comment, mate! If you already have a 2.5-inch exhaust system, yes, this will work just fine for a turbo setup. However, because you want to retain it and I’m unsure what brand it is, you may need to just purchase the dump pipe with the turbo kit and then custom make the exhaust section that feeds into your existing exhaust.
Otherwise, if you are interested, we can supply with a 100% bolt-on 1HZ turbo back exhaust system in 3-inch, in both aluminized steel or stainless steel.