Estimated reading time: 5 Minutes
If you’re considering fitting a front mount intercooler to your 1HD-FTE Landcruiser, you’ll come across the crossover delete question. It sounds more complicated than it is – and in most cases, it’s also more optional than people think. This article breaks down what the crossover actually does, what’s involved in removing it, and which approach applies to your specific engine.
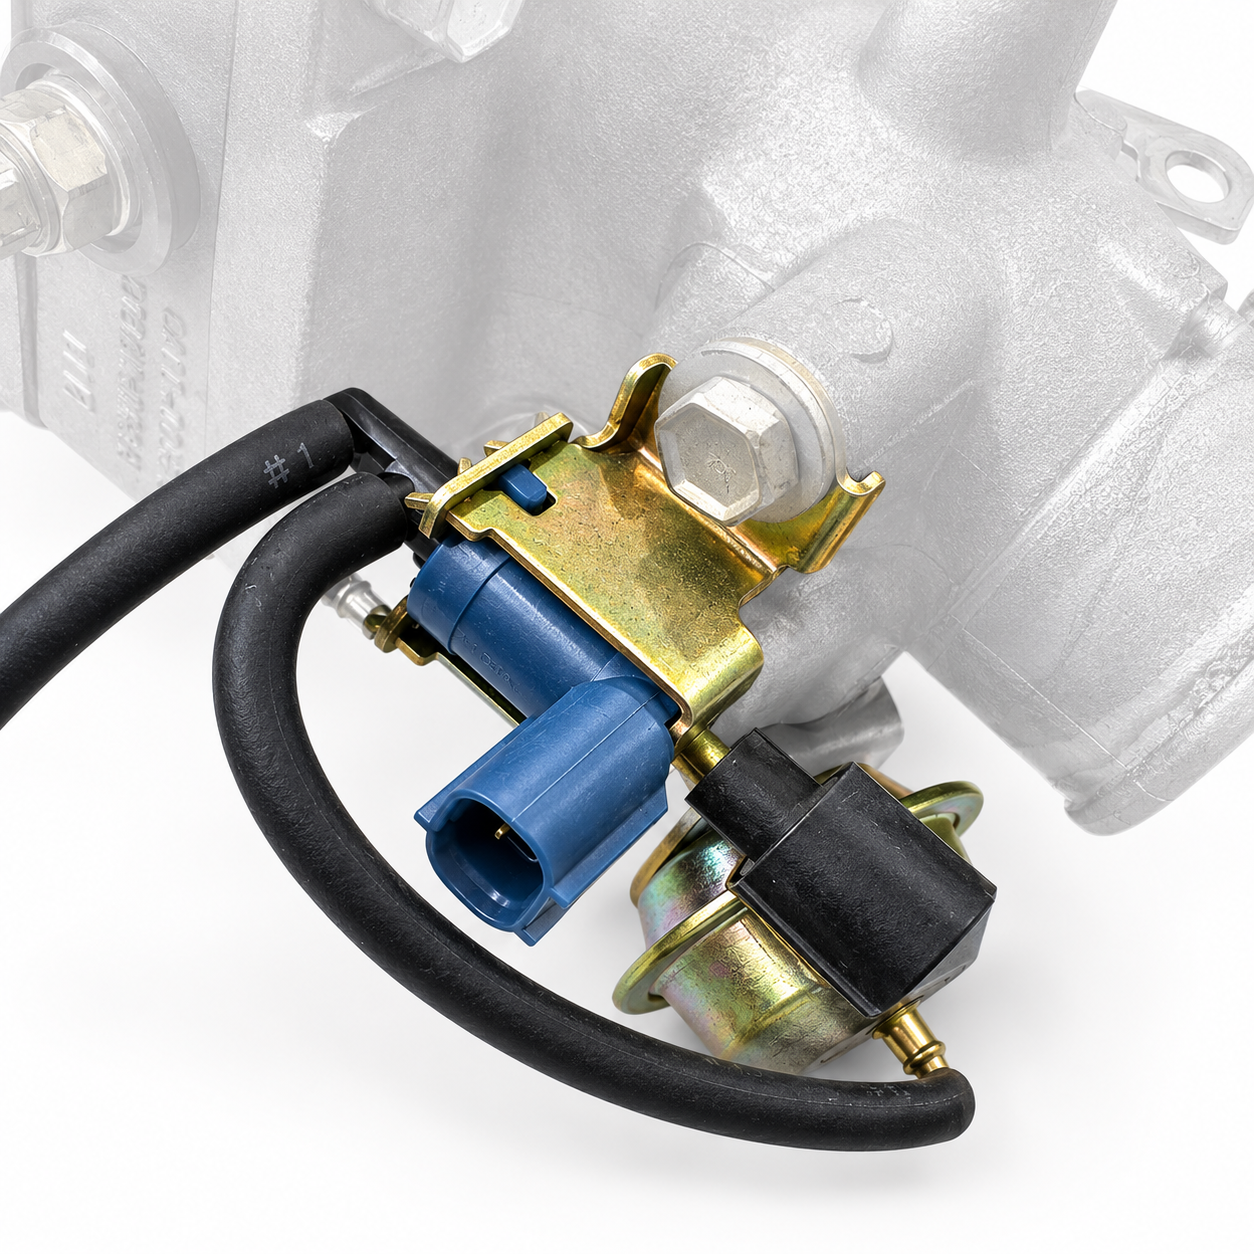
What Is the Crossover?
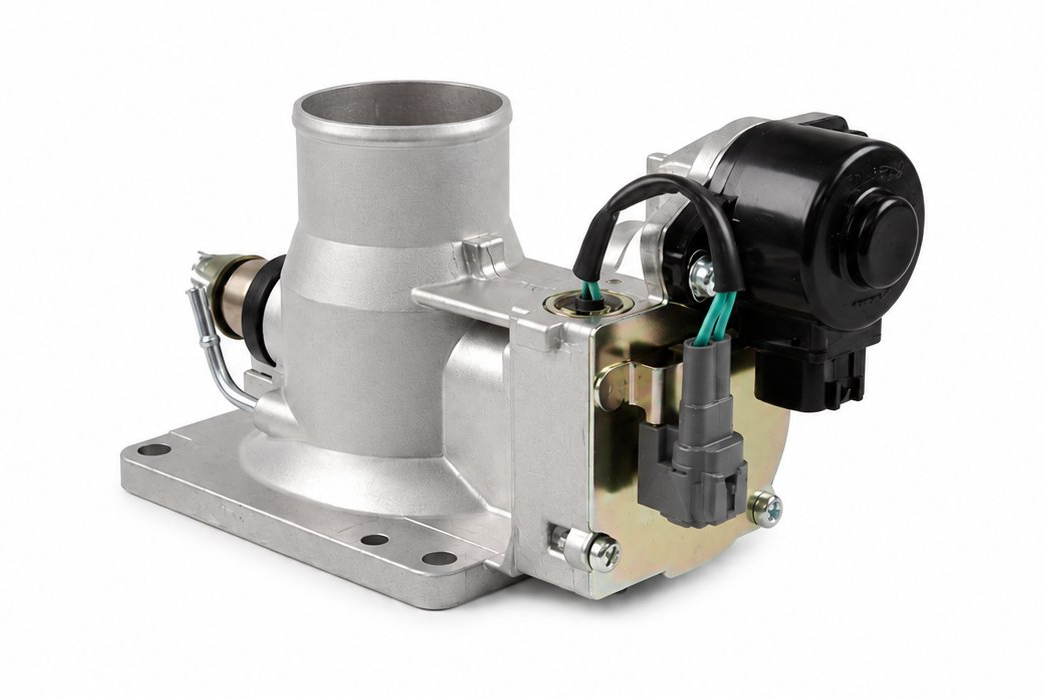
The crossover pipe contains (so-called because it runs across the top of the engine) contains the smooth shut-off throttle body, as well as housing EGR valve and intake temp sensor. Toyota fitted it as part of the engine’s emissions and NVH management system. When you shut the engine off, it briefly closes the throttle body to stop the engine shuddering and shut it down smoothly.
It’s not a power adder or restrictor in any way on the vast majority of builds. What it does do is sit in the intake path, take up space, and complicate intercooler piping – which is why many people doing a front mount conversion want it gone.

Pictured above: Early HDJ100 Crossover with the blue solenoid on the shutoff valve (Left section). Middle section contains the EGR valve which is only vacuum operated.
Do You Actually Need to Remove It?
Short answer: probably not. In 9 out of 10 builds we do, the crossover stays in place with no issues. We’ve seen 1HD-FTEs make over 380hp with the factory crossover still fitted. At the really pointy end of performance builds it may offer a marginal gain, but for anything up to and including 350hp – which covers virtually every street and touring build – we have not found it to be a limiting factor.
The main reason for it’s removal is purely aesthetics or to simplify piping when installing a Front Mount Intercooler. The crossover sits across the valve cover, so your Cooler piping has to run across it as well to join up. Some people also just prefer a cleaner engine bay. Both are valid reasons – just know it’s not a requirement.
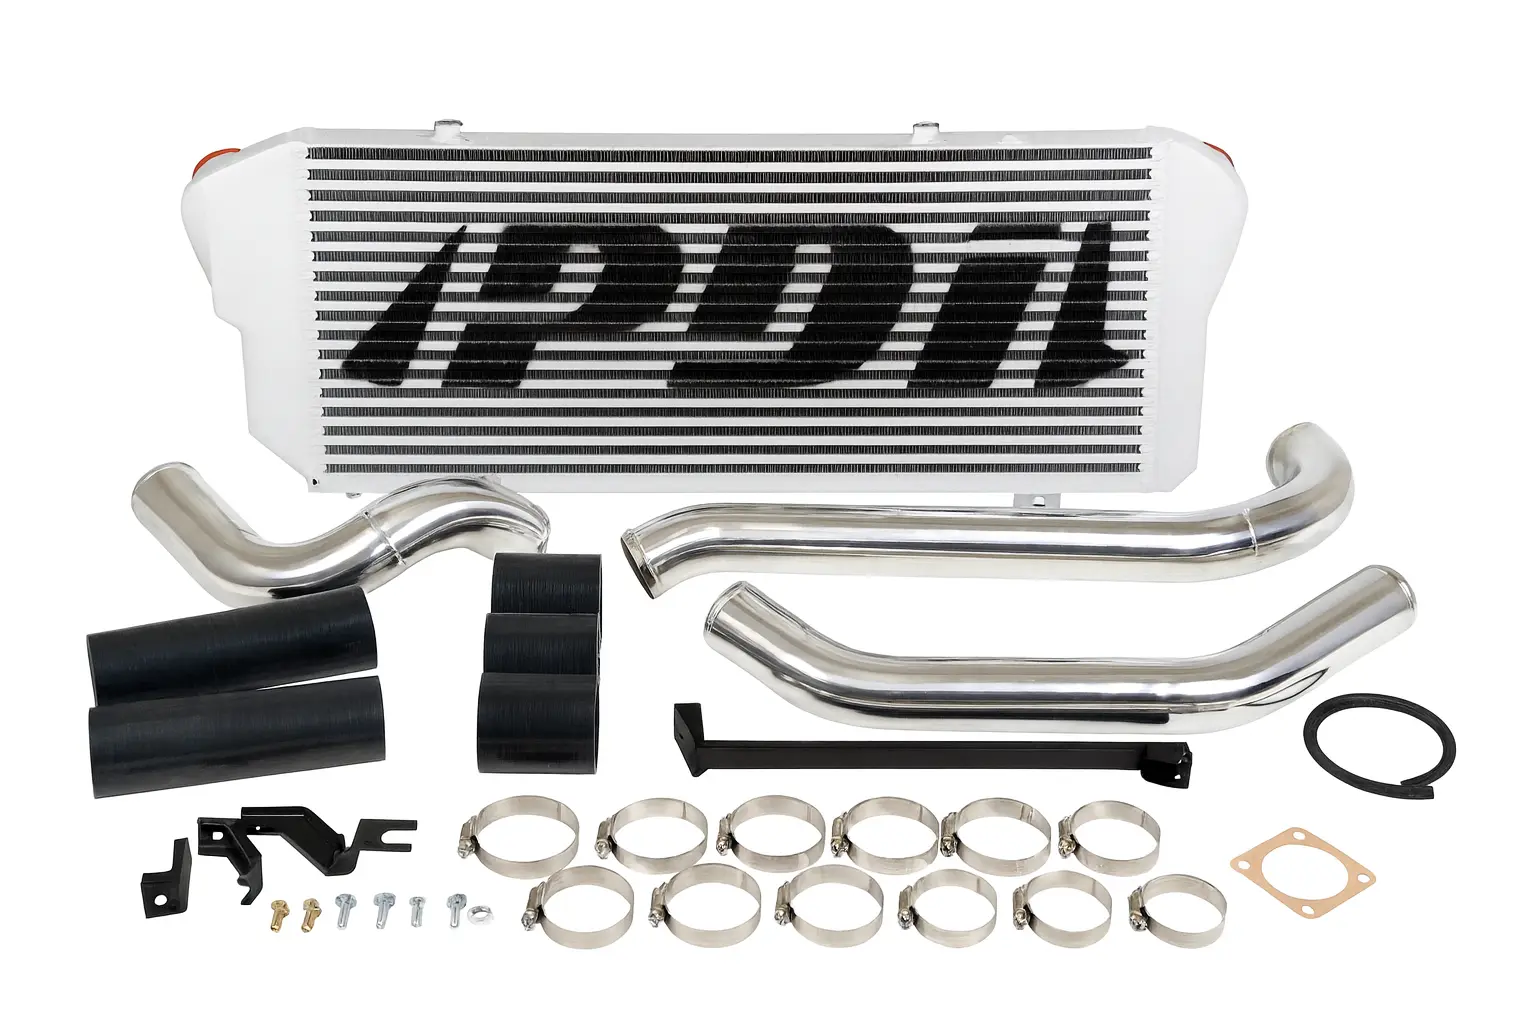
Our PDI intercooler kits for the HDJ79 include an optional crossover delete. The 100 Series and 80 Series kits are listed separately below with the relevant delete plug where applicable.
Which Engine Do You Have?
The crossover setup changed across the production run of the 1HD-FTE, and the right approach depends on which version you have. There are three distinct situations.
1998-2007 HDJ79 – Simplest Delete
The 79 Series has a vacuum-operated solenoid setup that can be removed cleanly. The throttle body comes off, and our smooth shut-off delete plug can be installed into the blue solenoid’s electrical connector. The remaining Air Temp sensor and vac lines for boost reference are connected into the new Crossover Delete Adaptor. That’s it – no fault codes, clean result.
This is the most straight forward delete of all the variants, all year models are the same.
1998-2002 HDJ100 – Vacuum Solenoid (Same Delete, Minor Variation)
Early 100 Series engines use the same vacuum-assisted solenoid setup as the 79. In most cases, our HDJ79 smooth shut-off delete plug fits and you can remove the throttle body entirely, same as above. Then its just a matter of connecting the remaining Air Temp sensor and vac lines for boost reference into the new Crossover Delete Adaptor.
There is a small blue solenoid that actuates the crossover. On these models, you have two options:
- Remove the throttle body and plug the blue solenoid’s connector with the delete plug – solenoid can be left plugged in or removed
- Leave the solenoid plugged in and just remove the physical throttle body – the solenoid has nothing to actuate, no fault codes triggered
The delete plug is listed as a HDJ79 part only by our supplier, but it has worked on every 1998-2002 HDJ100 we’ve tried it on at the workshop. Worst case, it doesn’t suit your specific build – leave the solenoid plugged in and return the plug, they’re cheap.
2002-2006 Late HDJ100 – Electronic Throttle Body (Slightly more difficult)
Late model HDJ100s moved to an electronic throttle body on the crossover. This changes things – if you simply unplug or remove it, you will trigger a permanent check engine light. There is no simple plug-and-play delete on these engines.
If you want it gone, the practical options are:
- Relocate and hide the throttle body – extend the loom, mount the unit somewhere out of sight (inside the guard, near the firewall, etc), and let it keep doing its job electrically while freeing up the intake path
- Remove the solenoid from the throttle body housing and leave it plugged in – We’ve seen some installers do this and tuck the solenoid away somewhere. The ECU stays happy, and the crossover delete can be installed.
For most 100 Series owners on this engine, our honest advice is to run the intercooler piping around the crossover rather than fight it. The kit is designed to work with it in place, and as noted above, it is not a power restriction at the HP levels 9/10 builds are making.
While You’re In There – Three Things to Address
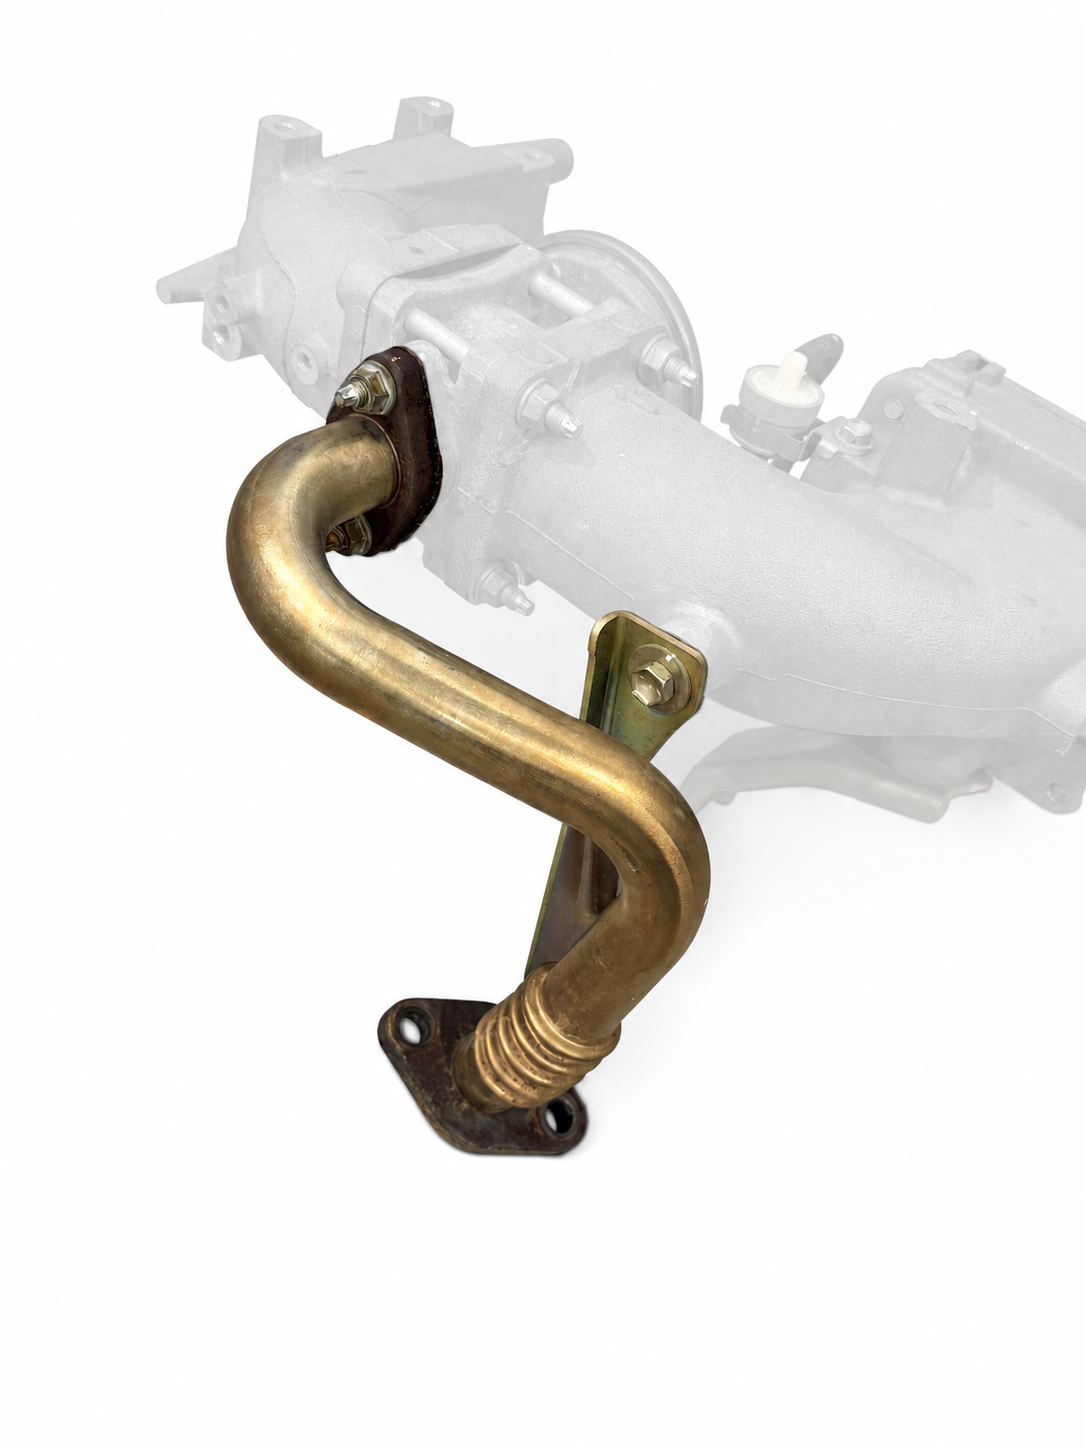
The EGR Pipe
When you pull the crossover assembly, this pipe is going to have to have nowhere to connect up. If you’re removing the EGR pipe entirely, blank off the port on the factory exhaust manifold.
We stock a thick billet blank plate which was designed for this exact job.
The Blue Solenoid (HDJ79 and 1998-2002 HDJ100)
The small blue solenoid that actuates the crossover on 79 Series and early 100 Series engines is often a point of confusion. You have a couple of options:
- Leave it plugged in and tuck it away – it won’t trigger any codes and does nothing without the throttle body attached
- Replace it with our smooth shutoff delete plug if you want a tidy finish
Either approach works fine. It’s more a tidiness preference than anything else.
The Intake Heater
Separate to the crossover solenoid, the intake heater is its own heating element mounted on the throttle body with its own dedicated solenoid in the engine bay. When the throttle body comes off, the heater comes with it – leaving a 12V supply wire that needs to be dealt with.
Two options:
- Cover the wire end – unbolt the heater and cover the exposed wire with a protective sheath. Gets it out of the way, but leaves a live 12V wire in the engine bay
- Remove it at its solenoid – the better approach. Trace the wire back to the heater solenoid in the engine bay and remove it there. No live wire, clean result. If you order a PDI Intercooler kit, instructions mentioning this are provided.
What happens when you remove the heater? For 99% of our Australian conditions, absolutely nothing. The engines start up immediately even on colder days.
80 Series with 1HD-FTE Conversion
If you’re running an 80 Series with a 1HD-FTE engine swap, the same crossover considerations apply based on which engine variant was used in the conversion. The crossover delete and intake adapter we sell are both relevant here depending on your piping setup.
80 Series 1HD-FTE Front Mount Intercooler
PDI kit for 80 Series conversions. If you’re running custom piping or an engine swap with non-standard intake routing, the 1HD-FTE intake adapter is a useful addition.
Quick Reference by Model
| Model / Year | Crossover Type | Delete Method | Fault Code Triggered? |
|---|---|---|---|
| HDJ79 1998-2007 | Vacuum solenoid | Delete plug, clean removal | No (with delete plug) |
| HDJ100 1998-2002 | Vacuum solenoid (blue) | Delete plug (fitment unconfirmed on all variants), or leave solenoid plugged in | No (with delete plug) |
| HDJ100 2002-2006 | Electronic throttle body | Relocate and hide, or gut the solenoid housing | Yes – if disconnected |
Not Sure Which Intercooler kit or adaptor you need?
Shoot us a message. We can also confirm whether the delete plug will suit your specific model before you order.